Cosmetics
Summary
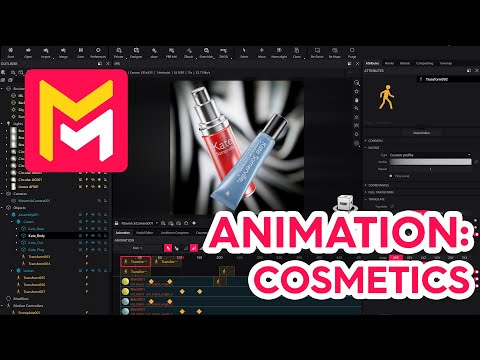
This YouTube video tutorial demonstrates animation techniques in Maverick Render software. The tutorial covers creating complex 3D cosmetic animations involving vertical movement, rotations, and easing adjustments. It also explains how to implement material changes over time using blend materials and keyframes within the software's node editor. The final animation showcases cosmetics rising, rotating, and changing color dynamically. The video concludes with a rendering of the completed animation, including depth of field effects.
F.A.Q.
-
How do you animate the movement of objects in Maverick Render? To animate movement, you use motion controllers. You create a motion controller and assign it to the object you want to animate. Then, you set keyframes at different points on the timeline. By adjusting the object's position, rotation, and scale in these keyframes, Maverick will interpolate the motion between them. You can adjust easing to control how smoothly the object accelerates and decelerates.
-
What is easing in animation, and how is it used in Maverick Render? Easing in animation refers to how the speed of an animation changes over time. It affects the acceleration and deceleration of movement, making animations appear more natural. In Maverick Render, easing is applied to motion controllers. You can choose preset easing types like "ease out" for a smooth stop or customize easing curves to create unique and dynamic motion profiles.
-
How can you create complex rotations and animations of multiple objects at once? For complex animations involving rotations, you can set multiple keyframes at different points in the timeline, each with its own rotation value, and then adjust easing. To animate multiple objects together, you can group them into a new assembly and apply a single motion controller to the assembly. This way, you can control all the rotations and movements as one.
-
How do you animate material changes in Maverick Render? Material animation in Maverick is done using blend materials. You create a blend material, which can combine multiple materials as layers. Then, you can animate the "weight" of each layer to make one material blend into the other. Set keyframes on the timeline for material weights, moving between the states where specific layers are at 0 or 1.
-
How do you organize materials for easy animation in Maverick Render? To prepare for material animation, duplicate the original material multiple times. Use these duplicates as layers within a new blend material. Adjust their color properties in these duplicates to differentiate them. Apply the new blend material to your object. This setup allows you to easily transition between different color states or texture properties by animating the blend weights.
-
How are keyframes used for animation in Maverick Render? Keyframes are fundamental for animation in Maverick. They mark specific points in the timeline where you set the value for object position, rotation, material weights or other properties that you wish to animate. Maverick interpolates between these keyframes, creating the animation. You create a new keyframe when you change a property's value at a different point in time.
-
What are front plates, and how can you use them to fade to black? Front plates in Maverick are graphic elements that you place over your scene, which can act as fades. To create a fade to black, add a front plate at the end of your timeline. You can then animate the opacity of the front plate from 0 to 1 over time. To ensure a complete black screen, set the opacity to 1 from the start and at the end of the frame and set it at the end of your animation sequence.
-
What is the process for reviewing animations in Maverick Render? To review your animation, use the timeline playback function. Scrub through the timeline to view your animation. Adjust camera position as needed to focus on desired parts of your animation. Pay special attention to the timing of your movements and material transitions. Tweak animation and easing settings until you are satisfied with the final results. Consider enabling depth of field for a more dramatic effect.