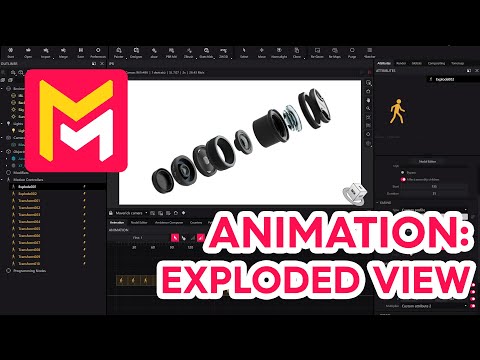
Exploded View
Summary
This YouTube tutorial demonstrates how to create exploded view animations in Maverick Render. The process involves using explode motion controllers, assemblies, and custom attributes to control the individual movement of objects within an assembly. The tutorial uses both simple and complex examples, showcasing how to adjust movement distances, add rotation, and implement easing effects like ping pong to achieve various animation styles. Specific steps, such as configuring multipliers for individual object movements and adjusting timeline positions, are detailed. The video encourages experimentation with different settings to create unique exploded view animations.
F.A.Q.
-
What is an exploded view animation in the context of Maverick Render, and what is its purpose? An exploded view animation in Maverick Render is a technique used to visually separate the components of an object or assembly, revealing its inner workings and structure. It's achieved through controlled movement of individual parts, typically along a specific axis. This kind of animation is particularly useful for showcasing product design, assembly processes, and the relationships between different components, making it easier for viewers to understand the makeup of a complex object.
-
How does the "Explode Motion Controller" work in Maverick Render? The Explode Motion Controller in Maverick Render allows you to create these exploded view animations by controlling the translation (movement) and optionally the rotation of objects within an assembly. You apply the controller to an assembly, and then define the overall movement along an axis, such as the Z-axis. Custom attributes are used to scale this movement individually for each object within the assembly, allowing certain parts to move farther or less far than others.
-
What are custom attributes and how are they used with the Explode Motion Controller? Custom attributes are object-specific properties that can be used as multipliers with the Explode Motion Controller. In the case of the Z-axis translation, for example, the controller specifies the maximum distance that the assembly will travel during the animation. Custom attribute 1 acts as a multiplier to that distance. By assigning different values for custom attribute 1 to each object within the assembly, you determine how far it will travel, either less than or equal to the maximum distance controlled by the main translation value. Similarly, Custom attribute 2 can be used to control rotation values separately for each object. This lets you fine-tune the exploded effect for each component.
-
How do assemblies play a part in creating exploded views, and why are they important? Assemblies are fundamental to creating exploded views because they allow you to group objects together and apply a single Explode Motion Controller to them. The controller can then affect all child objects within the assembly. It simplifies the process of managing complex scenes, allowing users to specify how the group of items will move and then use custom attributes to specify individual movement. Furthermore, by creating multiple assemblies, one can have distinct groupings moving in distinct ways. For instance, in the camera lens example, the upper and lower sections were placed in different assemblies allowing them to move in opposite directions with individual Explode Motion controllers.
-
How do you control the order and distance of movement for different parts within the exploded view? The order and distance of movement are controlled primarily through the custom attributes. You assign custom attribute 1 values based on the desired order and distance. For parts to move less distance or stay put altogether, use lower values for custom attribute 1, including 1 for a component that will not move. For parts to move the most distance from their starting position, use a high custom attribute 1 value. The animation order is typically achieved by assigning custom attributes sequentially depending on the order of separation you desire.
-
Can you add easing and ping-pong effects to exploded view animations? Yes, easing and ping-pong effects can be added to exploded view animations in Maverick Render. The Explode Motion Controller supports various easing options, such as ease-in, ease-out, and a custom profile that allows for finely controlled changes to the velocity. You can also enable the "ping-pong" effect in the easing options, which causes the parts to move to their exploded positions and then return to their original positions. This helps create a more dynamic and engaging animation.
-
How do you apply different rotation effects to parts within an exploded view? To achieve different rotation effects on parts within the exploded view, you can use custom attribute 2, which acts as a multiplier for rotation just as custom attribute 1 acts as a multiplier for translation. By setting this custom attribute to different values for the various parts, you can get different behaviors when the rotation on the Explode Motion Controller changes. This allows you to create additional dynamism, adding another layer to the final product.
-
What is the benefit of organizing complex scenes into assemblies before creating an exploded view? Organizing complex scenes into assemblies is highly beneficial because it simplifies the overall process of using the Explode Motion controller. Assemblies enable one to work on specific parts of a complex model independently and with greater clarity. By breaking the model down into separate groups, one can apply an explode motion controller to each group, as opposed to working on each part of a complex model individually. This also enables an easier way to move different parts of the model in a more streamlined fashion.