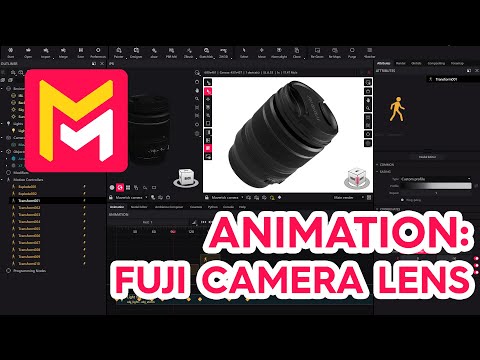
Fuji Camera Lens
Summary
This YouTube tutorial demonstrates animating a Fuji camera lens in Maverick Render. The process involves creating multiple motion controllers, each with customized easing profiles to achieve dynamic, non-robotic movements. The tutorial details adjusting rotations, translations, and scale at each controller's keyframes. Careful tweaking of tangents and continuous playback are emphasized to refine the animation's smoothness and appeal. The final result is a fluid, visually engaging camera lens animation.
F.A.Q.
-
What is the core technique for creating dynamic animations in Maverick Render as shown in this tutorial? The core technique involves using motion controllers applied to an assembly containing your object (like the camera lens). Instead of directly animating the object, you animate the assembly. Multiple motion controllers are added sequentially on the timeline, allowing for a series of movements. Each motion controller defines transformations like rotations, translations, and scaling and the transitions between motion controllers. By adjusting easing profiles, you create visually appealing accelerations and decelerations.
-
How does animating an assembly help in creating dynamic movements? Animating the assembly, rather than the object directly, allows you to easily combine and layer different transformations in sequence. You can control the overall movement of the object through the assembly and then apply rotations, scaling, and translations to the object relative to the assembly with separate motion controllers. This approach simplifies the process and provides a clear organizational structure to manage complex movements.
-
How are motion controllers added and positioned on the timeline? Motion controllers are added by dragging and dropping them onto an assembly. They are then positioned sequentially on the timeline. Each motion controller is started immediately after the end of the previous one, allowing for a continuous sequence of movements. This allows for a chain of transformations, each building upon the last.
-
How do you set the transformations (rotation, translation, scale) within a motion controller? Within each motion controller, you define transformation by going to the final frame of that motion controller on the timeline and adjusting the rotation, translation, and scale of the assembly. For precise values, you can use the mouse wheel over the spin bar while holding the control key. You can choose between global and parent coordinates for rotation and transformations are done relative to the object's current transform.
-
What is "easing" in the context of animation, and how is it used in this technique? "Easing" refers to the rate of change of a motion over time. It controls how an animation starts and ends. In Maverick Render, you can use preset easing profiles like smooth step, or create custom profiles. By adjusting the tangents of the custom easing curves, you can make animations start slowly and end quickly (acceleration), or start quickly and end slowly (deceleration), or any variation thereof which can allow you to make highly dynamic animations that do not look robotic.
-
Why is fine-tuning and iteration so important when creating animations with this technique? Fine-tuning and iteration are critical due to the cumulative effect of multiple motion controllers and easing profiles. You must carefully adjust the parameters of each motion controller and easing curve to achieve the desired look. The workflow involves frequently playing back the animation in the timeline and making minor tweaks until the sequence of movements and easing profile is satisfying. It often requires minor adjustments to the motion curves and can take time to make the desired effect.
-
How do you create more complex animations, such as a spin on itself, using this technique? More complex animations, like a spin on itself, are created by adding additional motion controllers. Each motion controller is added to the assembly and then you define the desired transformation in that specific controller (in this case a rotation around one of the axes). You can then change the easing to create a smooth and appealing movement. By combining different types of transformations across multiple motion controllers in a sequence you can create more complicated movements.
-
What does this technique offer to users who are new to 3D animation? This technique offers a fairly straightforward, intuitive method for creating dynamic animations by organizing movement into distinct motion controllers and allowing easy adjustment of easing profiles. This approach allows animators to more easily create impressive effects by thinking of their animations as sequences of movements. By allowing quick changes to the timing, and easing of motions, it helps beginners develop an understanding of the principals of animation.
