Lipstick
Summary
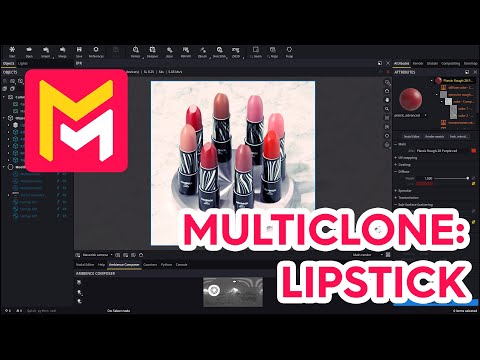
This YouTube video tutorial demonstrates how to use the multi-clone modifier in Maverick Render to create a realistic image of a circular array of lipsticks. The tutorial covers steps such as array creation, adjusting parameters for spacing and rotation, and adding random variations in rotation, position, and color for a more natural look. Advanced techniques, like cloning and disconnecting modifiers to manipulate specific parts of the object, are also shown. The final result is a visually appealing image achieved efficiently using the software's features. The video concludes by encouraging viewers to experiment with the tool.
F.A.Q.
-
What is the multi-clone modifier in Maverick Render, and what is it primarily used for? The multi-clone modifier in Maverick Render is a powerful tool used to create multiple instances of an object, arranged in various patterns. It's primarily used to efficiently replicate objects, like the lipsticks in the demonstration, for product visualizations, complex scenes, and designs that require many instances of the same or related objects. This greatly reduces the time and effort of manually placing individual items.
-
How can you create a circular array of objects using the multi-clone modifier? To create a circular array, you apply the multi-clone modifier to an object, then disable the Y and Z axes to constrain instances to a single plane (X axis). By enabling the "polar" option you can array the instances in a circle. Adjusting the radius, angle offset, total rotation angle (e.g. 360 degrees for a full circle), and instance count lets you control the appearance of the array. The overlap option is used to fill gaps in the circle with instances.
-
What is the purpose of randomizing the rotation of instances within a multi-clone array? Randomizing the rotation of instances adds subtle variation, which dramatically boosts the realism of a scene. Perfect uniformity is rarely seen in the real world, so adding random rotations helps to eliminate the artificial look that can sometimes result from cloning objects. This randomization makes the cloned items look more natural and less like copies.
-
How can you modify only a specific part of a multi-cloned object, such as the lipstick tips, separately? To modify a specific part of a multi-cloned object, you need to separate that specific part out of the original group. Then, apply a second multi-clone modifier only to that specific part. By disconnecting the second modifier from the initial modifier it is no longer bound by the first set of clones. This allows different parameters to be applied to that separated group while retaining the overall look. In this example, the lipstick tips are grouped separately and then have their own multi-clone modifier applied so they can be moved independently.
-
Why might a pivot point need to be adjusted when using multiple multi-clone modifiers on different object parts? If separate parts of an object are multi-cloned using distinct modifiers (like the lipstick bodies and tips), their pivot points may not align correctly. If they do not align, it can cause the new cloned objects to be offset from their base counterparts, requiring adjustments to ensure the cloned parts are positioned correctly in the scene.
-
How can the multi-clone modifier be used to create variations in height amongst instances? Within the multi-clone modifier on a separately cloned group of object parts, you can randomize the translation of instances along a specific axis (e.g. Z-axis for height) using the "randomize" attribute. This allows some instances to rise taller than others, adding further variation to the cloned array. This gives an effect that would be too time consuming to make manually.
-
How can you randomize the colors of multi-cloned objects? To randomize colors, you need to modify the material properties. In the demonstration, the diffuse color is saved to a palette, then a color general map node is created, linked to the material's diffuse, transmission and subsurface colors and then the saved color is applied and randomized across the hue, saturation, and lightness ranges. This results in color variation across the cloned instances, making the image look more interesting and lifelike.
-
How does the use of the multi-clone modifier and randomization techniques contribute to the final rendered image? By using the multi-clone modifier, you can quickly create intricate setups with numerous objects. By using randomization techniques for parameters like rotation, translation, and color variation, you add realism and visual complexity to a scene, avoiding a sterile and artificial look. In the example image, these are combined to create an appealing and natural marketing image.