Drone
Summary
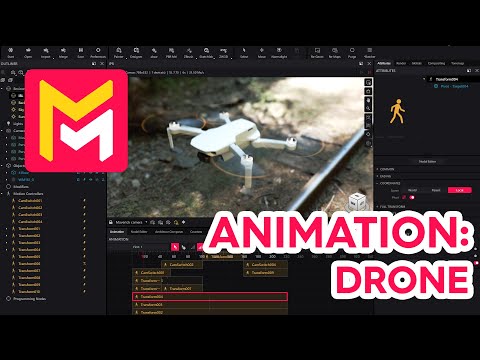
This YouTube video tutorial demonstrates animation techniques in Maverick Render software, specifically focusing on animating a drone model. The tutorial covers animating propeller rotations, addressing motion blur issues, setting up environmental lighting and camera positions, and creating camera transitions and smooth movements. It also explains how to organize the 3D model for efficient animation and provides tips for rendering high-quality video output. The process includes using motion controllers and targets to control object movement and manipulating settings to achieve realistic effects. Finally, the video showcases the completed animation.
F.A.Q.
-
How do you properly organize a model in Maverick Render for animation, especially with multiple moving parts? When working with complex models that have multiple moving parts, such as a drone with rotating propellers, it's crucial to separate each animatable component into its own distinct object within the model's hierarchy. This allows you to apply individual motion controllers to each part and animate them independently. In the case of the drone example, the body is separated from each motor, enabling separate animation of the propellers.
-
What's the process for animating a propeller in Maverick Render, ensuring it rotates around its center? To animate a propeller correctly, begin by creating a motion controller and applying it to the motor object. Set the desired rotation in turns. If the rotation is off-center, create a 'Target' object, position it at the exact rotation axis using the 'surface mode' option, and then include this Target within the drone's assembly. Finally, activate the 'pivot mode' in the motion controller's coordinates and select the newly created Target. This ensures that the rotation occurs around the correct center point, instead of the object's centroid.
-
Why might motion blur appear "polygonal" instead of circular, and how is this corrected in Maverick Render? Motion blur may appear polygonal when animating circular objects because the default settings may not have enough subframes to accurately calculate the blur. In the 'Globals' panel under 'Motion Blur Settings', adjusting the 'subframes' value can significantly improve motion blur quality. Increasing this value tells the renderer to calculate more intermediate frames, resulting in smooth, circular motion blur, rather than a series of straight lines. The optimal number depends on the specific animation, but numbers that follow the equation 2^n + 1 can be used for better optimization.
-
How can you simulate a drone takeoff animation in Maverick Render, controlling both upward movement and easing? To simulate a drone takeoff, apply a motion controller to the entire drone assembly. Then, set the final Z-axis position in the timeline to indicate the final height of the takeoff. By shortening the motion controller duration, you control the speed of the movement. Further refine by applying easing settings; adjusting the tension will make the takeoff animation smoother by starting slowly and speeding up.
-
How do you add camera motion and switch between different viewpoints in an animated scene? To add camera motion, attach a motion controller to the camera. You can then adjust various camera parameters, such as rotation or position in a final timeline frame, to create a camera movement. To transition between different viewpoints, create multiple camera positions, and use the camera switch motion controller to jump from one camera to another at the desired moment in the timeline.
-
How can camera changes be synchronized with the object being animated for dynamic transitions? To synchronize camera changes with an animated object like the drone, ensure that the motion controller durations for both the camera and the object overlap or align. Apply similar easing settings to both motion controllers. Use camera switch motion controllers to make the view switch to different camera angles at specific times to keep pace with the drone's movements.
-
What are some methods to enhance transitions in Maverick Render and add visual polish? To enhance transitions, you can use techniques such as adding fade effects at camera switch points. This is done by placing frontplate motion controllers (set to ping-pong mode) at the camera transition point and setting the frontplate to black, creating a fade-in/fade-out effect between camera angles. By cloning this frontplate and using it at the different camera switch points, these visual enhancements can be implemented throughout the scene.
-
What are some key steps for rendering an animation in Maverick Render for good video quality? For rendering, go to the render panel in the timeline tab and configure the resolution to match your desired output. Set the sampling level, typically between 7 and 9 with a denoiser, for a balance of quality and render time. Specify an output path and enable video saving. Finally, increase the bit rate to produce higher-quality videos for smooth and clear animations.