Jewelry
Summary
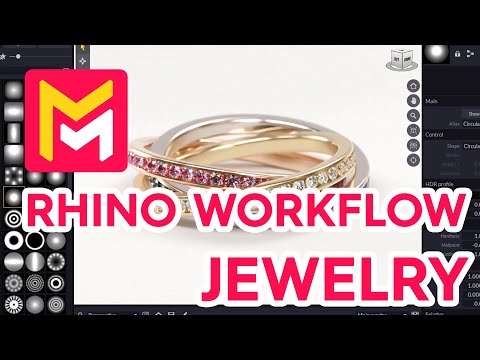
This YouTube tutorial demonstrates a workflow for creating photorealistic jewelry renders using the Maverick Render software and a new plugin that bridges it with Rhino. The tutorial covers importing Rhino models into Maverick, applying materials, lighting techniques, and generating high-quality renders and animations, including PSD files with layered elements for easy post-production. Specific features highlighted include the use of layers in Rhino for efficient organization, Maverick's material application methods, light mixer for adjusting lighting, and the creation of turntables. The video emphasizes the ease and speed of achieving photorealistic results.
F.A.Q.
-
How do I get my Rhino models into Maverick Render? The most efficient way to transfer your 3D models from Rhino to Maverick Render is to use the free Rhino to Maverick bridge plugin. You can download the installer from the "Try" section of the Maverick Render website. After installation, you will find a dedicated Maverick toolbar in the Rhino user interface with options to send, update, and access tutorials.
-
Why is organizing my Rhino models by layers important when using the Rhino to Maverick plugin? Organizing your Rhino objects into layers based on their materials is highly recommended because it directly translates to Maverick's object organization. When you send the scene to Maverick, objects will be grouped in the objects panel corresponding to the Rhino layers. This makes applying materials to specific parts of your model much easier and more efficient, and allows for easier selection and modification of objects.
-
How do I apply materials in Maverick Render after importing my Rhino models? You can apply materials in Maverick by dropping them from the shading library onto either the objects themselves in the IPR (Interactive Path Tracer) or onto the object groups in the Objects Panel. Holding the ALT key while dropping a material applies it to all objects with the same existing material on the selected object. Using the Objects Panel to apply materials to object groups is recommended for better control and clarity.
-
Can I make changes to my Rhino model after sending it to Maverick and update the rendering in Maverick? Yes, the bridge plugin allows you to update your scene in Maverick to reflect changes in Rhino. The update button will synchronize the geometry changes while keeping the material work you did in Maverick. Whether you move, add, or remove objects in Rhino, you can use the update function to transfer your geometry updates to Maverick. You can also update just a selection, if desired.
-
How can I achieve realistic lighting for my jewelry renders in Maverick Render? Maverick offers a variety of pre-made lighting setups called "ambiences," specifically designed for product presentations, particularly jewelry. These include lighting, environment and floor configurations. You can use those found in the IBL White or Studio section. Furthermore, you can manually adjust lighting by dropping gradient lights into your scene. The Normalite tool will automatically activate, allowing you to move and position lights on the geometry. Finally the Light Mixer tool allows you to adjust each light individually.
-
What are some tips for enhancing the realism of a render using the camera in Maverick? For added realism, consider enabling depth of field (DOF) using autofocus or manually adjusting the focal plane. Use the focus pre-visualization feature to visually determine what is in focus and out of focus. The camera's properties panel allows you to adjust aperture to achieve depth of field similar to a real-life DSLR camera, which contributes to a more professional and detailed render.
-
How can I render a product image with a transparent background or with elements on separate layers in Maverick? To create a render with a transparent background, ensure that the backdrop option in the ambience is enabled in the compositing panel. If you want separate editable layers, such as an object with shadows and reflections detached from the background, use the render sets feature, type "all," choose PSD 16-bit format, and enable the denoiser. This will create a .PSD file with layered elements in photoshop and a .PNG with the shadows included in the render itself, which can be overlaid onto any background.
-
How can I create a turntable animation of my jewelry piece in Maverick? You can create turntable animations by using the turntable tab. Select the object for rotation, and preview the animation. To prevent the room from rotating, lock the room in the objects panel. Adjust the turntable render quality, enable the denoiser, and set the output file path to render a video file, which will then be rendered to your computer.